Creating RenderWare Avatars for WorldsPlayer
WorldsPlayer uses a modified version of the Renderware 2 framework to create 3D graphics. It retains several features from the original Worlds Chat, which used the more primitive in-house Accomplish rendering engine. The 3D avatars you see in Worlds are made up of 3D polygonal models with the file formats "RWX", "RWG", and "BOD". Combinations of these models which make up articulated avatars are stored in the RWG and BOD binary formats, while static meshes are stored in Renderware Scripts using the RWX format.
This tutorial will cover the basics of creating and importing an RWX file into WorldsPlayer.
The Basics of Renderware Scripting
RWX models are written in plain, human-readable ASCII text. They are executed sequentually like a script and then constructed into a 3D model in memory using those instructions:
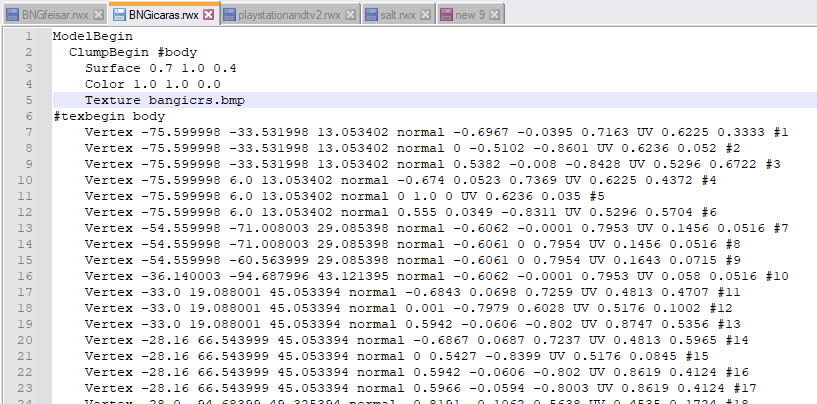
Of course, you could model everything with a keyboard... if you're a masochist. We're going to let modelling software do most of the heavy lifting for us in the background. We will be coming back to this script however in order to make small adjustments that the software may have missed.
Being a very old format, Renderware scripts do things a little differently than modern modelling formats like FBX. For starters, materials are not defined separately from submeshes or mesh data and then assigned to each face. They're baked directly into each submesh. This doesn't really mean anything in the end since separate materials require separate draw calls anyway, but it does change the way you'll be making your 3D materials for Worlds.
Each submesh in Renderware is called a "clump". Clumps can be nested inside one another. You can tell where one clump ends and another begins by looking at the ClumpBegin and ClumpEnd commands. You can also theoretically have multiple models in the same file using ModelBegin and ModelEnd too, but that isn't really supported here nor necessary. Nearly everything else about modern-day 3D modelling you already know is the same.
The RWX interpreter will simply ignore any features it doesn't recognize or support. WorldsPlayer does not support a lot of modern rendering techniques like programmable shaders or specular/normal maps. It only supports the absolute basics: albedo (color) textures, monodirectional diffuse lighting, primitive monodirectional specular highlights, and some very basic ambient lighting. Transparent materials are supported too to some extent.
If you want to learn more about RWX, you can read about it here and here.
Preparing for the Conversion Process
Before we do anything, download and install Accutrans 3D. You can get the free version on their website and use it forever. We will need it later, since most modelling programs don't support Renderware anymore.
Open the model you want to use as your avatar in your favorite modelling software. I will be using Blender, but it does not matter what you use.
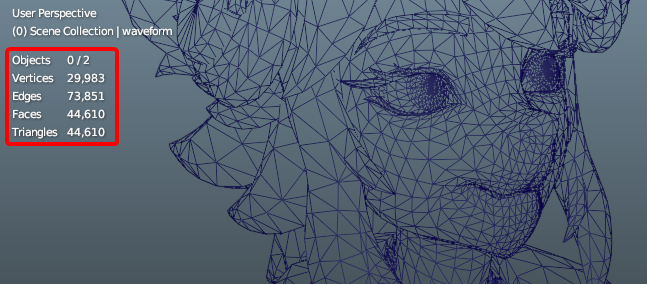
Check your polycount to make sure it's not too high. If it's above 10k faces, try to reduce it using retopology or decimation. This isn't required, but it's the right thing to do. Software rendering isn't very efficient!
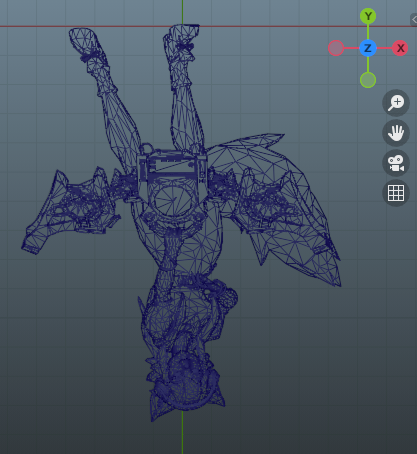
If you use a decimation modifier to automatically reduce the level of detail, you may run into some issues with clipping where round polygons were reduced into flat ones. Look carefully for anything that needs to be fixed, and adjust it:
Now we need to convert our textures and set up our materials. If you want to save bandwidth when other users download the textures from the internet, you could compress them using the proprietary Accomplish CMP format, but using the SDK tools to create CMP files is a little convoluted and would require a whole other tutorial. You can use a variety of image formats supported by Renderware such as RAS and BMP instead. For this tutorial, we will be using BMP since it's widely supported and piss-easy to work with. BMP is completely uncompressed though, so textures will waste a lot of space.
On the topic of texture size, WorldsPlayer only supports a maximum texture size of 256x256 pixels for memory-saving reasons (WorldsPlayer launched in 1998 when the average RAM capacity was only 32MB). Any textures larger than this will be scaled down until they can fit within that limit. This can and most likely will cause issues for you later down the line, so if you care a lot about having an avatar that does not look like oatmeal, then you may need to make adjustments to the UV map, then cut the textures and materials into several pieces. We will cover this towards the end of the tutorial.
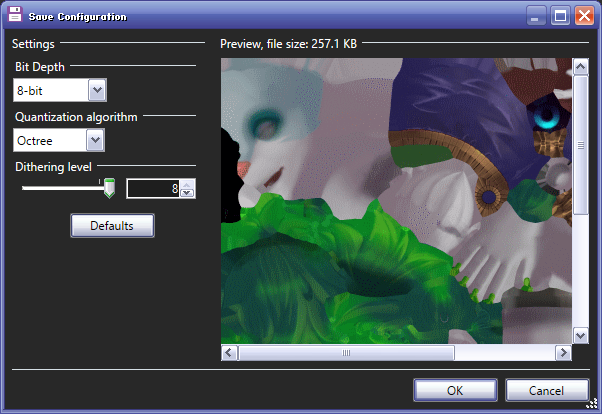
For now, we won't be cutting up the UVs into pieces, so we're going to just convert the original textures to an 8-bit BMP. You can use 24-bit as well but it's not recommended. The colors will be reduced by Renderware at runtime anyway, so there's no point in wasting space on extra colors. You should also downscale the textures with your own settings and make any needed changes ahead of time so that we can make sure WorldsPlayer's downscaling isn't getting in the way. This texture is still double the maximum size, but I have filtered it so it's a little cleaner at least.
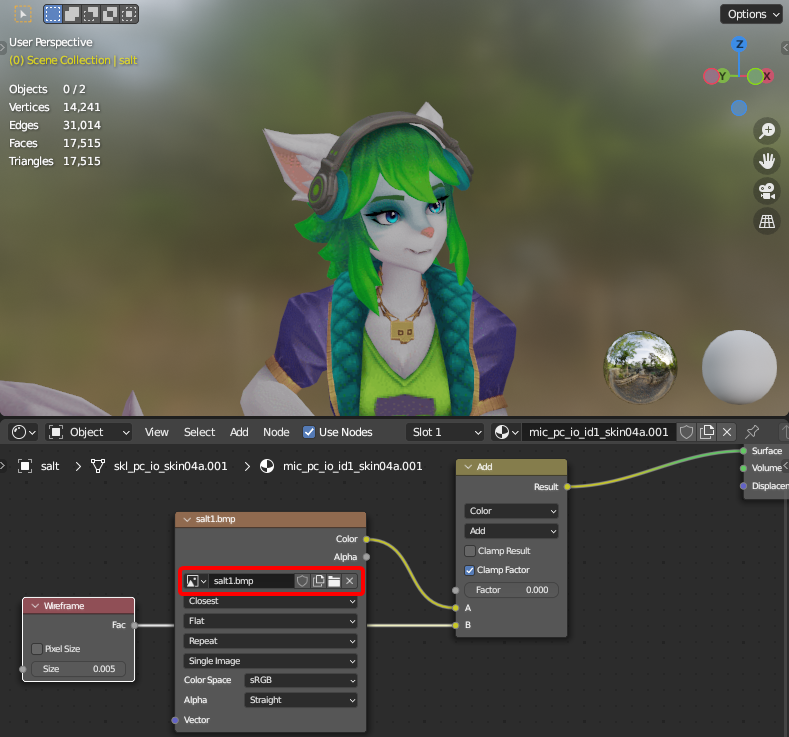
Now we need to assign the new textures to their materials. You could do this later on when we convert the model instead, but doing it here saves us time.
Now we have to rotate and scale the model so it matches what Worlds expects from an avatar. WorldsPlayer avatars are all rotated to face up for some reason. The units of measurement in Worlds is also FUCKING MASSIVE, meaning your model is most likely way too small right now. Let's fix that.
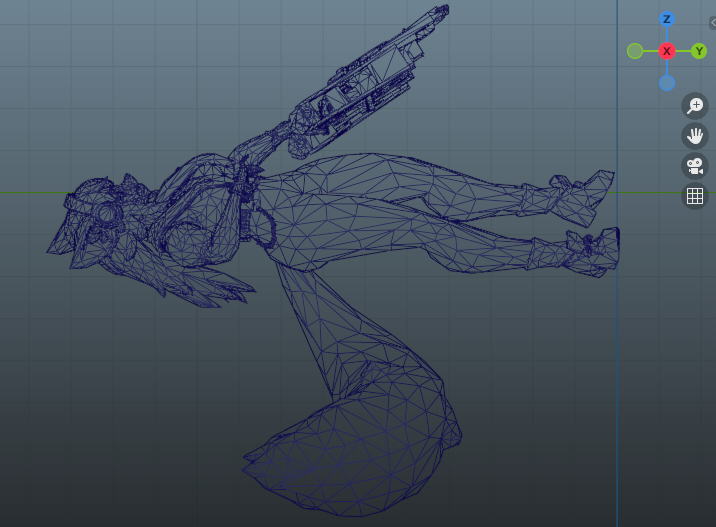
Rotate your model 180 degrees on the Y axis (or whatever axis coresponds to "sideways" in your software) so that the character is upside down. Then rotate the model 90 degrees on the X axis (or whatever axis is "forward") so your character is facing up at the sky. Move the avatar around so that the bottoms of the feet line up with the line for the Z or "up" axis (meaning it is at 0m on Y), and are centered along the line of the Y axis.
It should look something like this:
Make sure the origin of the model is centered at the bottom of it's feet so you don't accidentally misalign things while scaling. In Blender, you can set the pivot mode to 3D cursor and press Shift+C to bring the 3D cursor to 0,0,0.
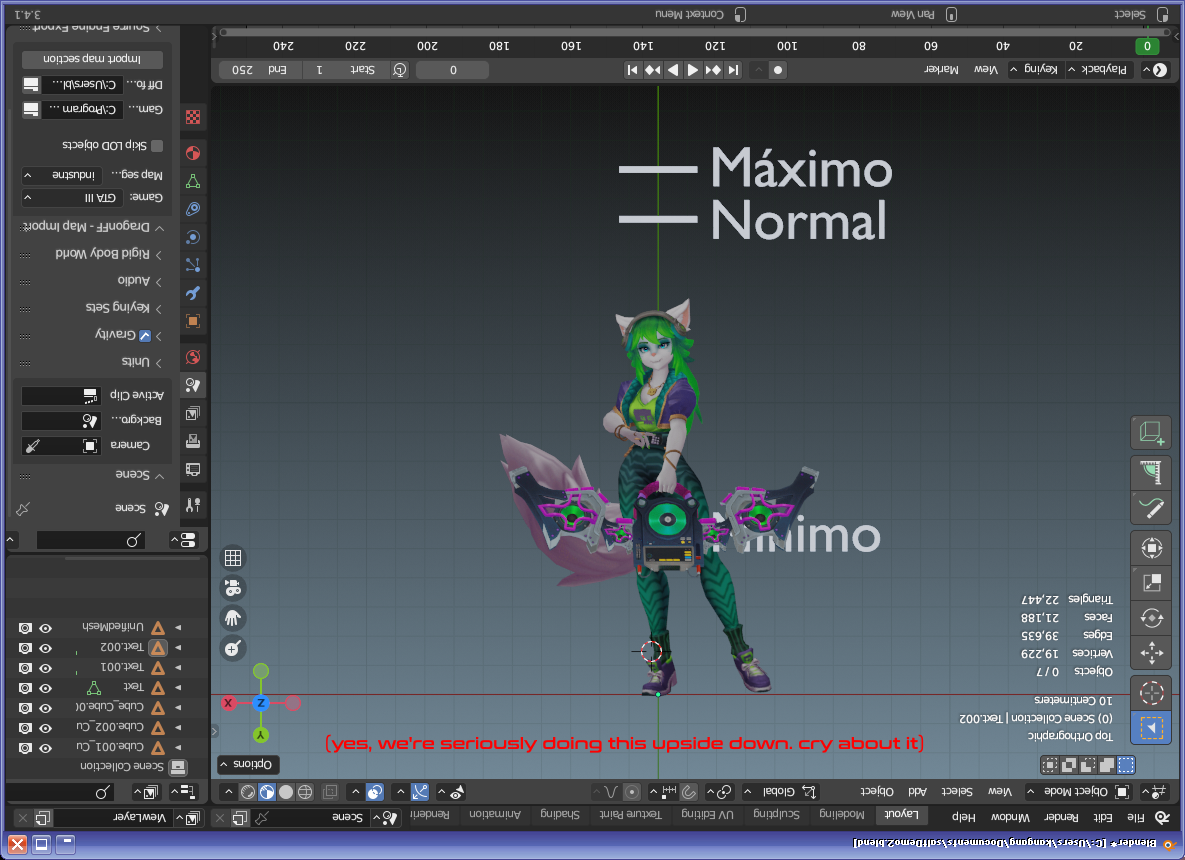
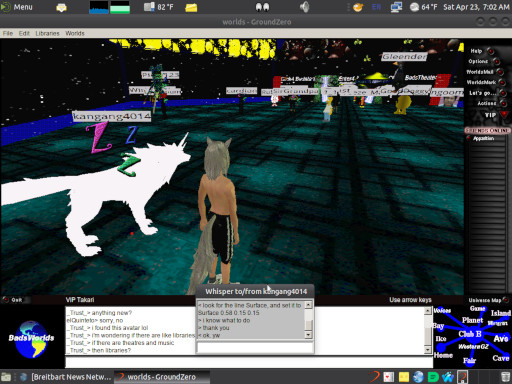
Now we have to resize the avatar model and check the height of the avatar. Usually tiny avatars are up to -0.55m, while most human-sized ones are about -1.63m. Make adjustments accordingly, and don't be afraid to get other models in the scene temporarily to use as a reference.
Nessu has a very helpful guide you can import into your scene to help line things up visually, click here to download it.
Converting your 3D Model
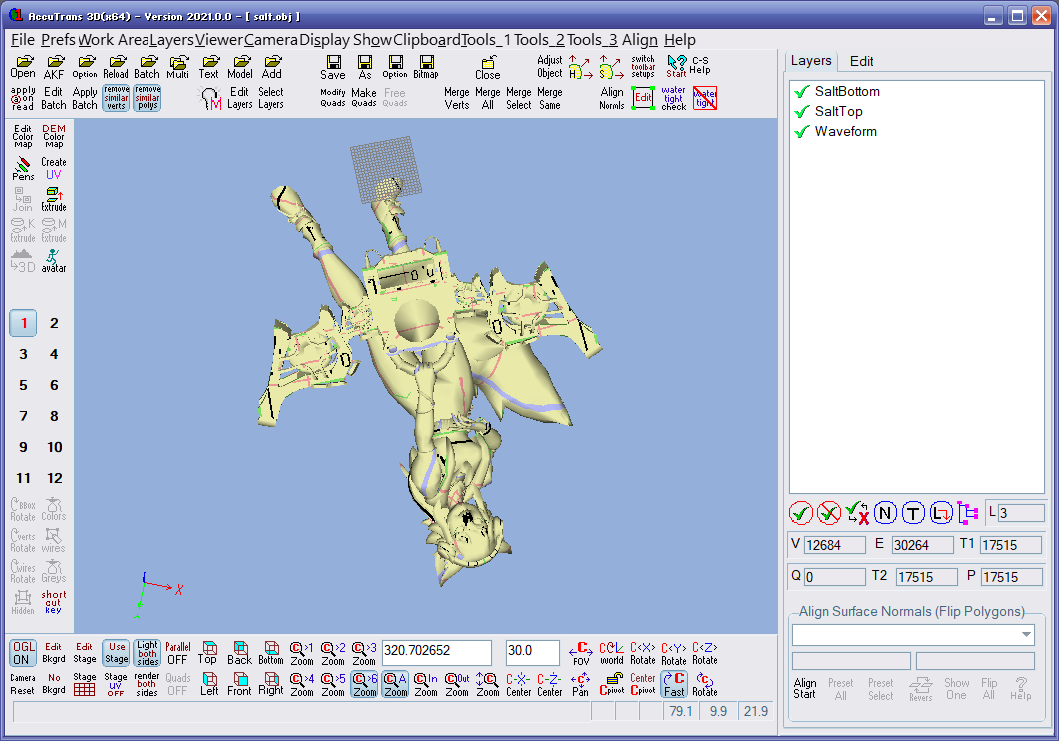
Export the scene as an OBJ file. Make sure that your textures are in the same folder as the OBJ and MAT you just exported. Then open the file in Accutrans 3D.
You should see your materials on the right side in the "Layers" panel. If your textures don't show up, don't worry, we'll check to make sure they're loaded properly when we manually inspect the output RWX here in a bit.
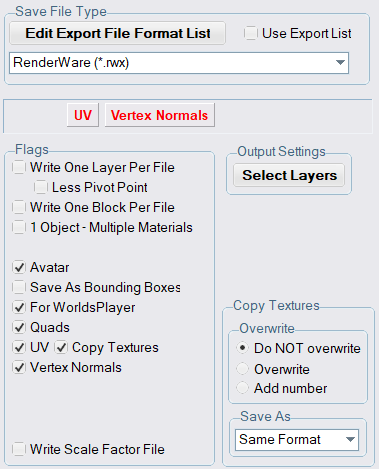
Go to File > Save With Options. Copy these settings, then click save:
Open the new RWX file in a text editor. Get yourself familiar with the Ctrl+F hotkey, because we need to search through all of the clumps and materials to make sure they're set up correctly. The most important thing you need to check is that "Texture" is present and set to the appropriate BMP file.
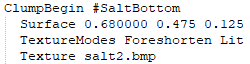
Search for each instance of "ClumpBegin" in the file. If the textures are where they should be, great! If "Texture" is missing, then you need to type "Texture (filename).bmp" underneath ClumpBegin so that Renderware knows what texture to load. If your intention was to use material colors instead of textures, that won't be saved with the RWX when you export it, so you'll need to redo those yourself using the Color command.
Next we need to tweak the lighting. By default, Accutrans likes to put a simple "Diffuse 1.0". Get rid of that, and replace it with the Surface command. You can tweak the numbers anywhere from 0.0 to 1.0. They control diffuse, specular, and ambient lighting in that order. The best values to use depend on the specific model, but I've found that something like "0.68 0.475 0.125" works really well. There are other material flags you can set too for things like translucency and fullbright, but we won't be covering those in this tutorial yet.
Now make sure to add "TextureModes Foreshorten Lit". This ensures the model is vertex-lit and phong-shaded, and that the perspective is correct (Worlds suffers from PS1-style texture wobble sometimes).
Do this for every clump in the model, then save the file.
Wearing your Avatar
For others to see your avatar, the files need to be hosted on a compatible web server where everyone can download them. Not all file hosts are compatible. Currently the best place to upload your Worlds stuff to is Worlio. Once your avatar has been uploaded to the internet, make sure everything is in the same folder on the web server, then grab the URL to the RWX file. Make sure the URL's protocol is set to HTTP and not HTTPS, because WorldsPlayer does not support SSL or TLS encryption.
Putting the avatar on can be a little tricky. WorldsPlayer has a restriction by default that prevents you from putting on avatars without the file extension RWG or BOD. There are mods such as WorldsPlus which can get around this, but if you don't have WorldsPlus, you need to be a little creative. Either edit the worlds.ini file in your Worlds folder and set "AVATAR" to the URL of your RWX file, or create an avatar picker in a world somewhere and interact with it. Once that's done, you can save it to your avatars list in the VIP menu and never have to deal with that again until you get a new one.
That is all! You can ask for any further help on the Worlio forums.
If you run into serious issues or wish to improve the quality of your avatar, please keep reading.
Fixing Bad UVs or Broken Textures
One of the most common issues you will run into with a lot of models is where the seams of the UV map are visible on the model.
This is a side-effect of WorldsPlayer downscaling the texture to fit into memory. The only way to fix this is to manually strip down your model into several smaller materials that use smaller texture sizes. This will not only fix the issues with the seams showing up, but it will also drastically improve the texture quality since all textures will already fit within the size limit.
When deciding what parts of the model to isolate into their own textures, you should prioritize smaller details, such as parts of the face. Larger or more primitive details can be left alone if you don't care about them as much.
Keep in mind that every new material you create requires a separate draw call. This isn't a huge deal nowadays, but if you're obsessed with framerates or really just enjoy good practice, then this might bother you. We're also bypassing a deliberate limitation of the engine put in place to prevent Worlds from eating all of the computer's memory, so doing this will inherently make your model less friendly to period-correct computer hardware.
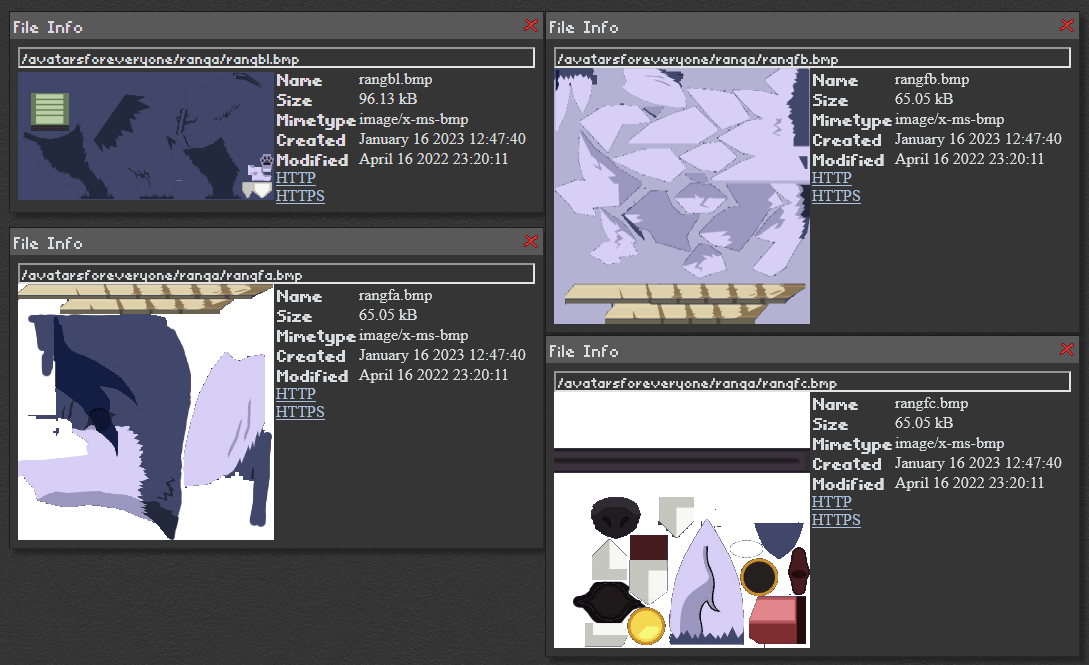
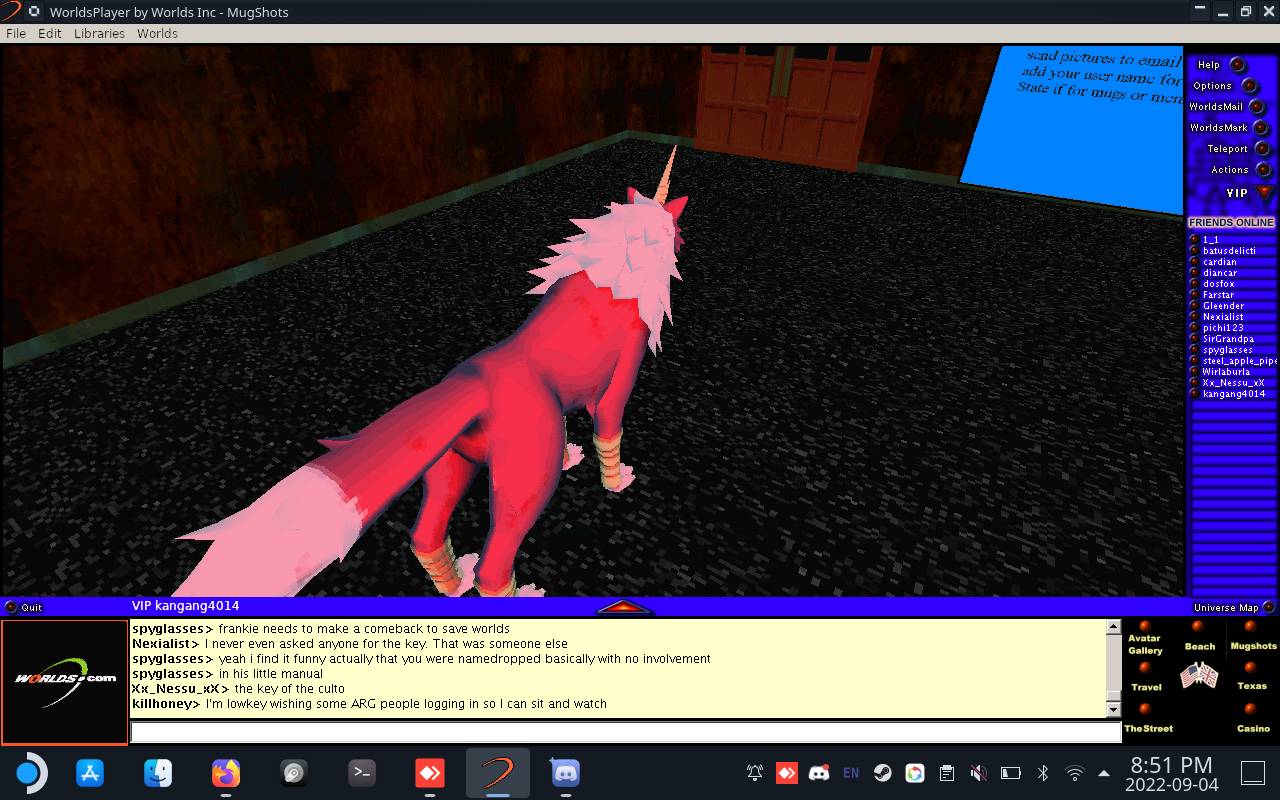
On Ranga's model, I split the face, mane, and face details (eyes, mouth, etc.) into three separate textures. I also took the legs and moved them to their own texture. Then I took the UVs of the body and shrunk them slightly for some of the faces so they would not go outside of their intended boundaries.

There, all better!
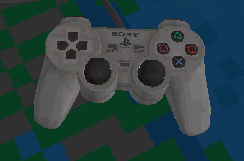
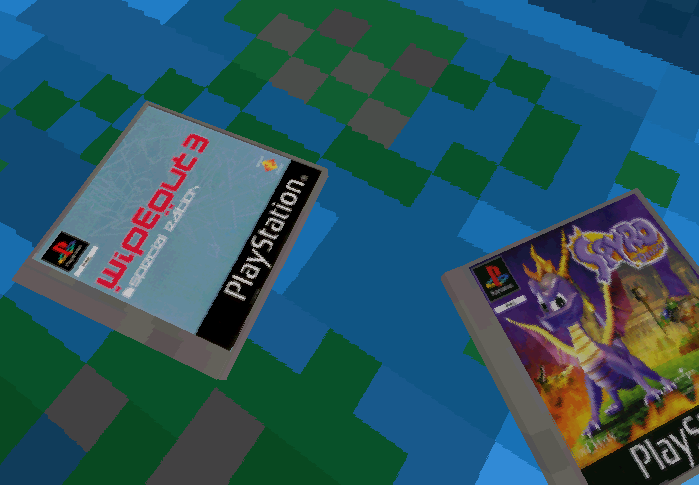
Here's another example. This one didn't have serious UV issues, but every part of the entire model was packed into a massive texture, and it looked terrible without segmenting it first. I was a little lazy since even just doing half of it required 10+ textures, but just look at how pristine the quality of that cover art is! And the buttons on the DualShock controller too. The Sony and PS logos on the CD drive lid are actually legible.

Fixing Invisible Polygons
You probably used a model with backface culling off on one of it's materials. This doesn't carry over into Worlds, since there's no way to disable backface culling for a clump in the RWX. The solution to this would be to duplicate the faces that are broken, and then invert the duplicate's normals so they face the other direction. This will double the polycount of whatever part you needed to fix, so be mindful of that.
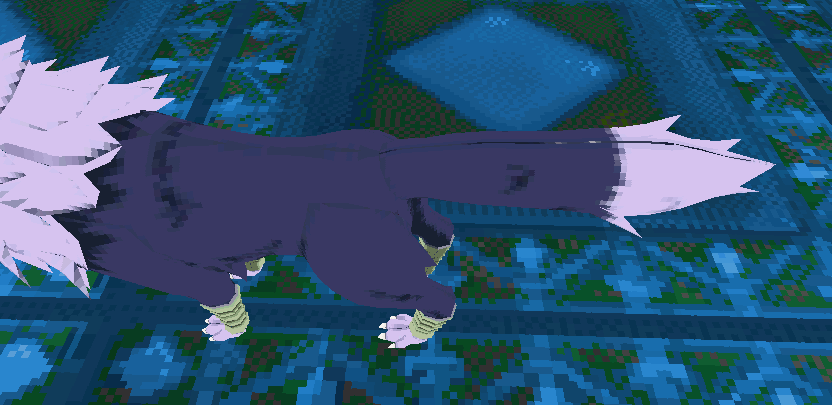
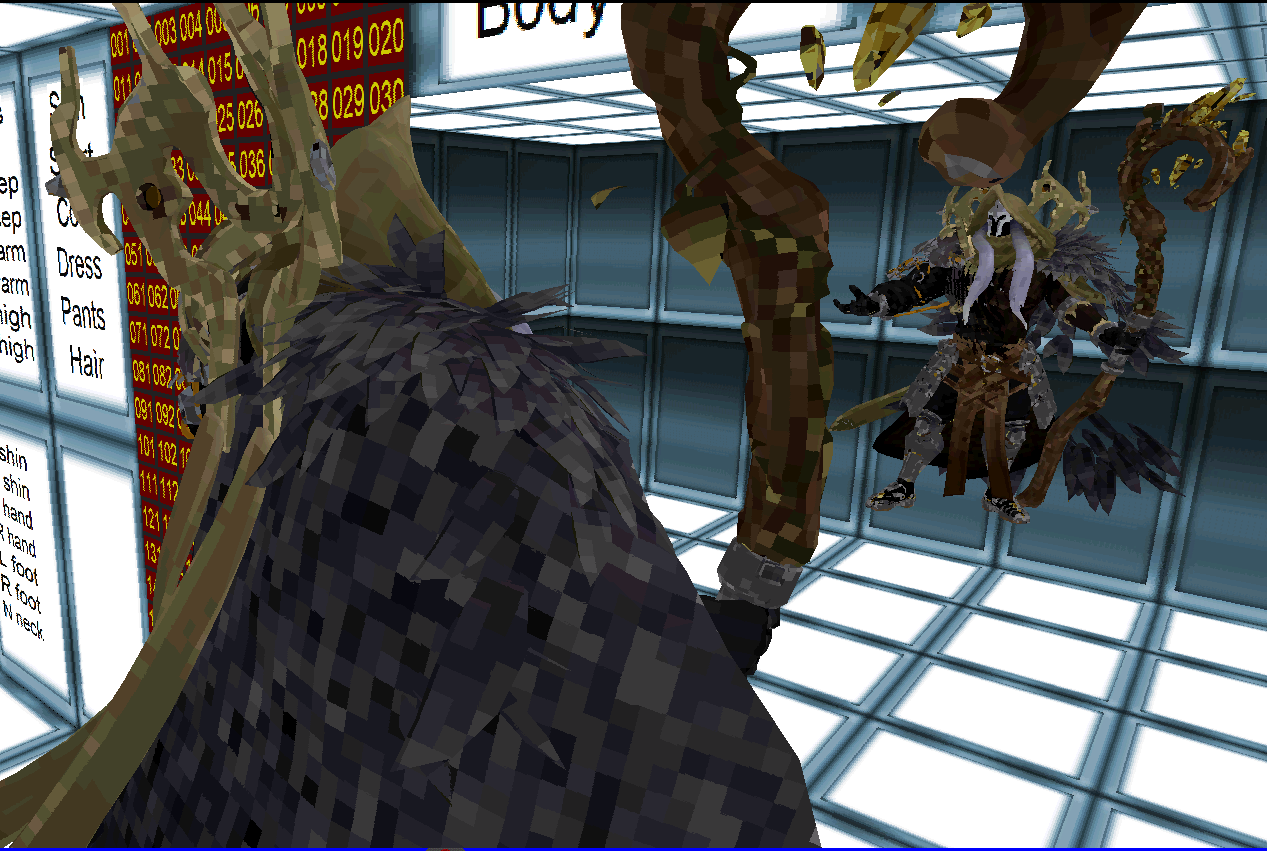
The cape on this model is invisible, only the feathers attached to it can be seen. This is because the cape part is just a flat 2D plane bent around the character with only one side. It's invisible from the front because the normals of the cape are facing backwards.
Fixing Models That Are Too Bright
If your avatar looks like it just got bleached by the force of a thousand suns, then congratulations, you're one of thousands of people to be unknowingly hit by a bug in AMD processors! Yes, this is an inaccuracy in the way AMD CPUs calculate the lighting in WorldsPlayer. I have no idea why this happens, all I know is that every modern AMD CPU is affected and you shouldn't try to "fix" your model's lighting parameters if this happens. The model is probably fine, it's just your computer being a little silly. You could try running in a virtual machine and seeing if that helps (try it without hardware virtualization extensions too if those are giving you problems), but I don't know how effective that is.
You probably invested in AMD for a good reason, especially if you're a Linux user, so I'm not about to tell you to buy Intel instead. But this is a caveat you are going to have to keep in mind when using Worlds on an AMD machine. This includes the Steam Deck as well.
I did manage to find an avatar that was completely unaffected by this bug, and it had "LightSampling Vertex" explicitly defined in it's materials. Try putting that in your model and seeing if that helps. Otherwise I would advise against making any other changes, since they're most likely just going to make the model look too dark for people using Intel processors.